


Good evening and welcome to a guide on how to stream Twitch with Streamlabs OBS.
Making a living and starting to gather people is an amazing profession and very profitable nowadays. So today I will show you how to start live streaming and enter the world of live broadcasting.
First to get started you need to create a Twitch account which is very easy however find a name or a good nickname and complete your registration.
The next step you need to do is download it Streamlabs is a branch of the OBS program that helps us make things much simpler and much faster.
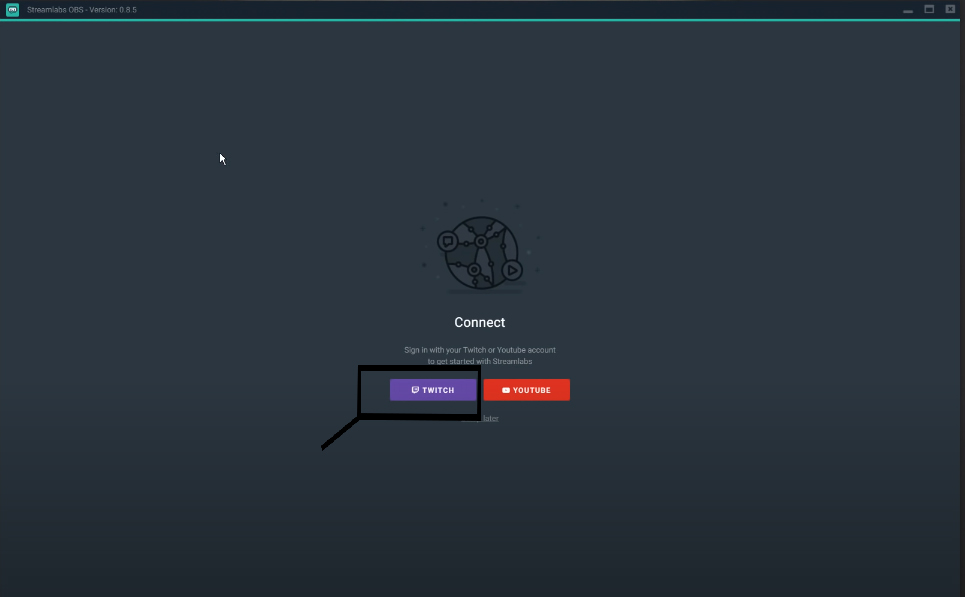
After downloading Streamlabs you will need to log in to our Twitch account with streamlabs.

Then it will take us to select some add widgets just skip this step and we will continue along the way.
The next step that will ask us is to Optimize the pc, that is, it will scan our pc and our internet to put the appropriate settings that will automatically enter our pc, really this process will help you very much especially if you are completely new to live. So press start and within a minute it will be ready.

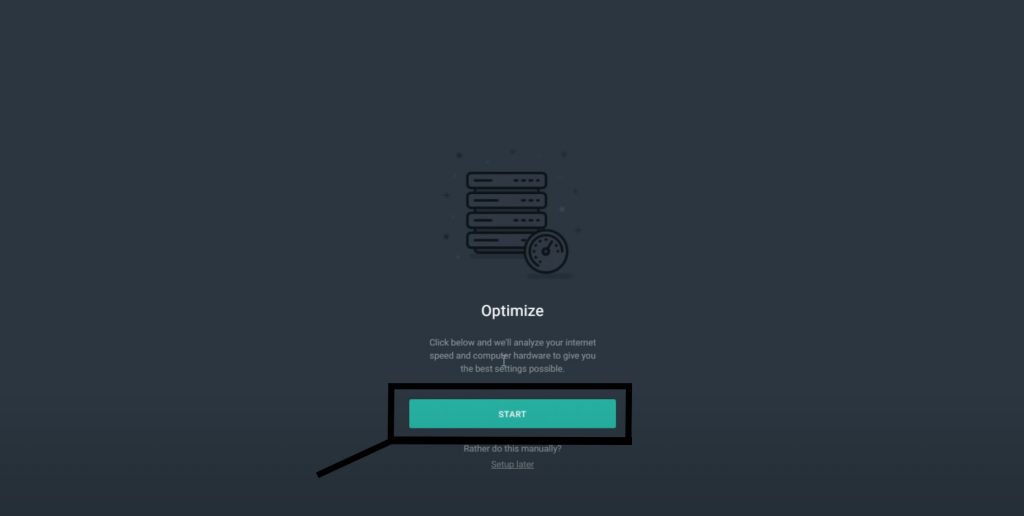
If you get other things click on "ask me later" to get you to the main streamlabs page.
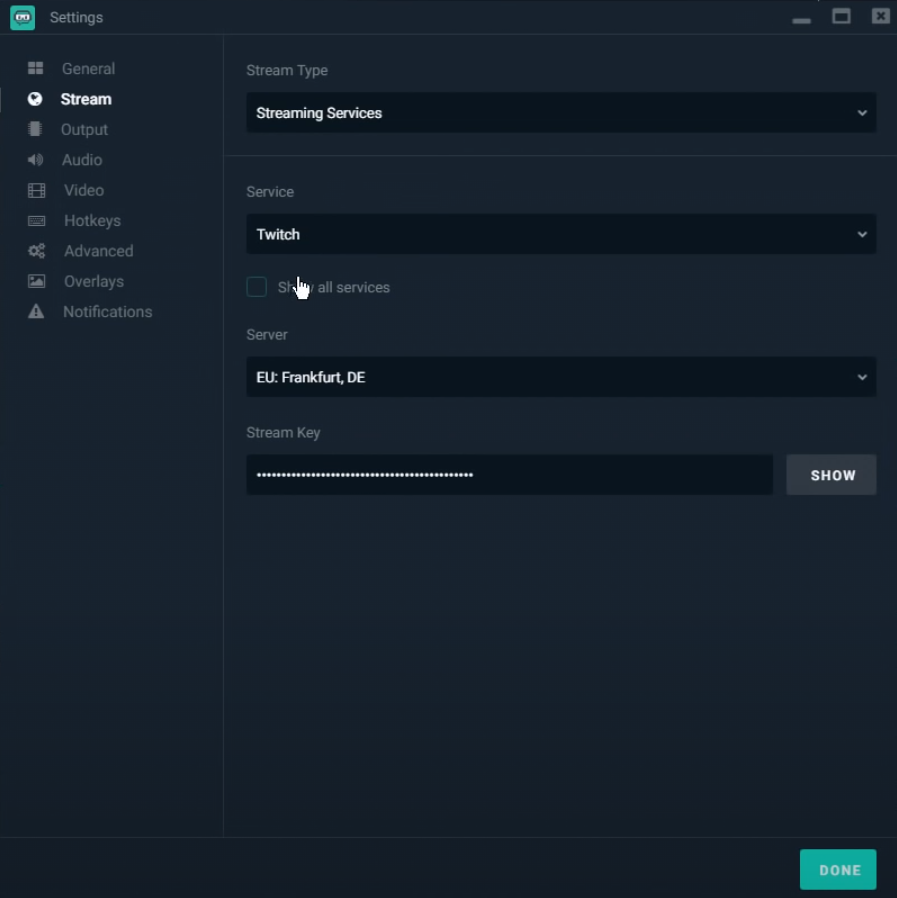
The next step is to click on settings where you will be able to make all the necessary settings for your live and generally do tests. However if you are completely new follow faithfully what we will show here. Click on the Stream category there it will automatically show you that you want to do live on Twitch from which server and at the end your only Steam key that usually gets it automatically.

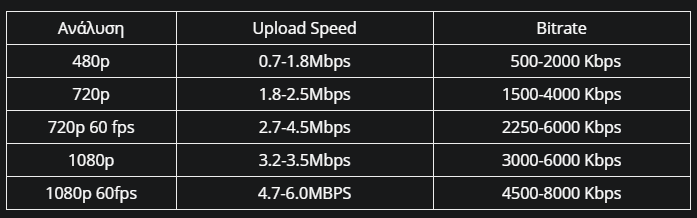
Then we go to the output category, in the output we select simple, we go to the streaming category and we see the video bitrate, it is good as we said before you try these bitrates and in the process tease it a little bit up and down.
Now that you will see how much internet is caught and what bitrate is good to put, first connect to speedtest and press GO and within a minute it will show you how much upload you have, because in this live we are interested in upload so if you have a line with 50mbps you can do live without fear ..
Examples


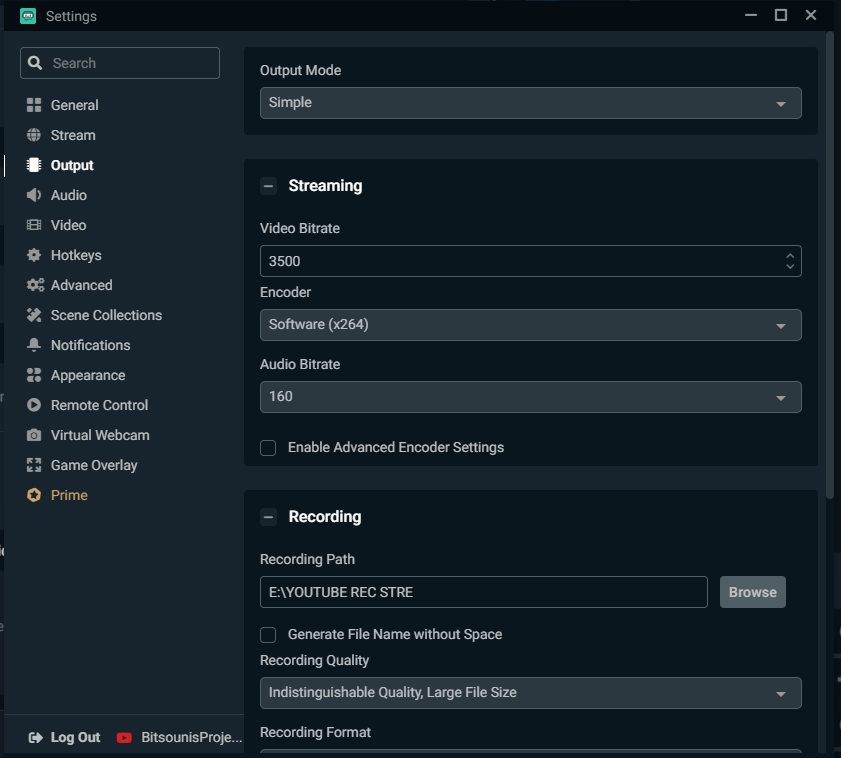
In the encoder you will have the default NVENCB but if your bitrate is below 3000 select the software (x264). (I choose to have it software (x264) because if for example I want to do live gta v in fivem the graphics card pulls too much so the processor is a good solution that at that time does not do anything.).
In the audio bitrate you also have low video bitrate and medium microphone, select 96 audio bitrate, but if you have a good microphone and video bitrate above 3000, put 192 audio bitrate.
In the next step we go to the video category, base (canvas) is the analysis that you play the game then we go to output (scaled) which is what analysis we will send to twitch try first what it suggests otherwise try a little up a little down ..


Which one below do we have downscale Filter where if you have a pc over i5 choose bicubic if you have a better computer choose it lanczos.
Finally in this category at Common FPS Choose the 30 or the best the 60 try both to see if you get stuck .. preferably 60 FPS is for games that have a lot of movement if you play something more stable 60 is fine.
After we have completed the process on how to send the live we now go to see how to connect and adjust the microphone, camera and game.
First let's see how to set up the microphone, we need to know from the beginning that choosing a good microphone is the best investment you can make.
First step we go to the home page and go to the point it says Sources and press the cross icon +, there as soon as the tab opens Add Source we choose it Audio Input Capture and press add source and it will appear in the sources, then we click on the audio input capture and on the device we select the microphone we want we press Done and that was it.

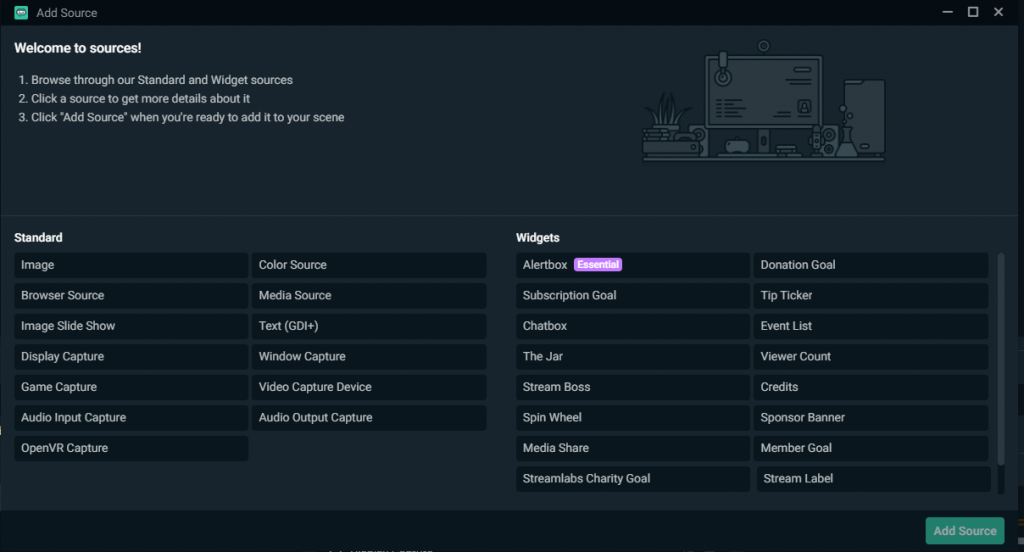

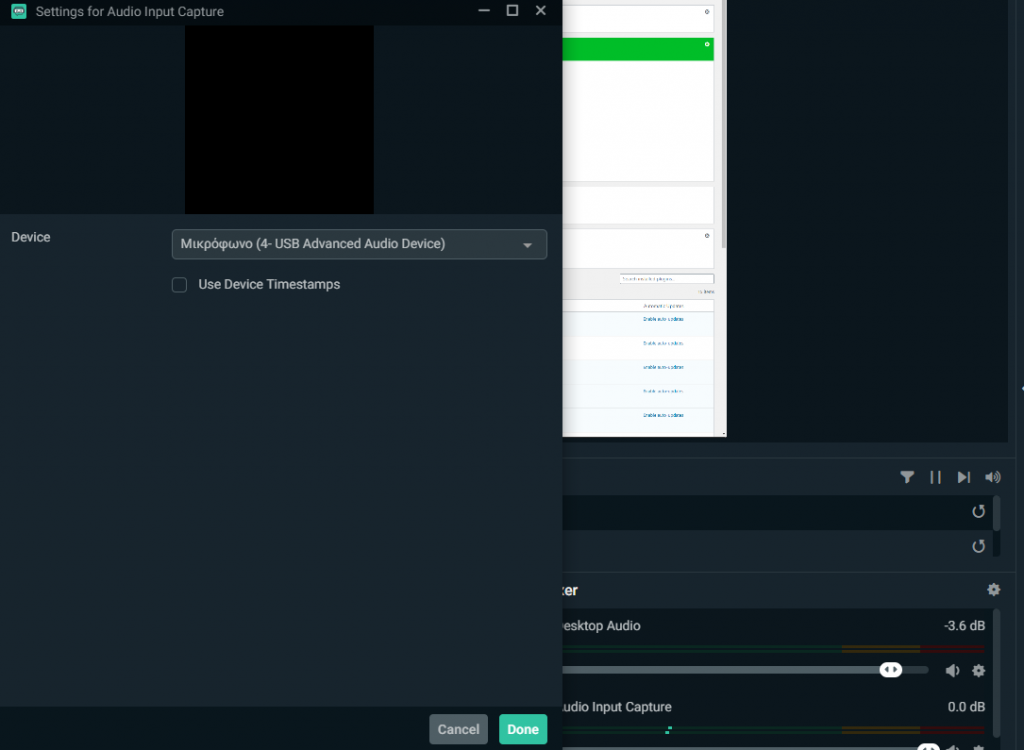
Table of Contents
Microphone settings and filters.
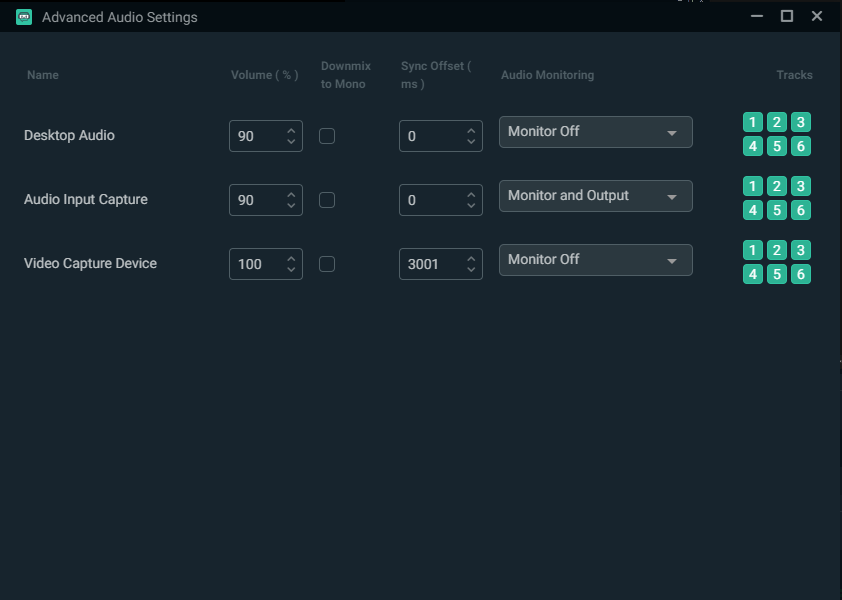
If you put the microphone and you have no problem then you are fine but if you hear various noises then we will go and put some filters for the microphone go back to the home page and go to the mixer category there on the right has an icon with a gear, just pressing it will take you to a tab Advanced Audio Settings there you will find it Audio input capture and from monitor off will you do it monirot and Output so you can hear from your headphones what sound the microphone is writing after we finish the process with the filters we will put it again monitor off.

Then go back to the home page and category Mixer we see it audio input capture and on the right it will have a gear you press it and it will have you category Filters, will bring you a tab there start adding the filters I have in the photo below and do tests because each microphone wants different settings.

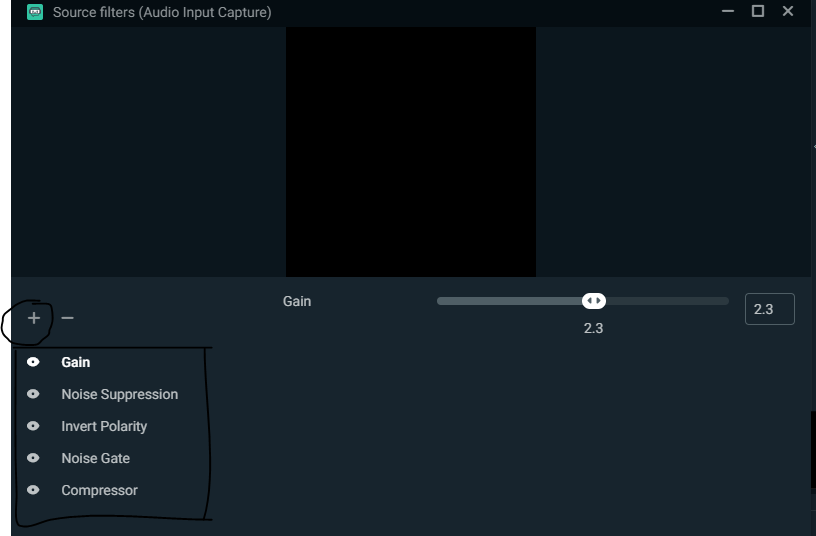
Gain: filter that helps us turn up or down the microphone volume.
Noise cancellation: Filter that helps us reduce noise from sounds even outside our room or our computer fan.
Noise Gate : Filter that helps us not to hear the keyboard so loudly when we press the buttons.
compressor: filter that helps us if a loud sound is heard not to be heard so loud in the microphone.
However, as soon as you are done with the setting, press Done and you are ready by the sound.
How To Become A Successful YouTuber | AdSense, Seo, Keywords, Thumbnail, Equipment, PC!
Webcam selection for Livestream
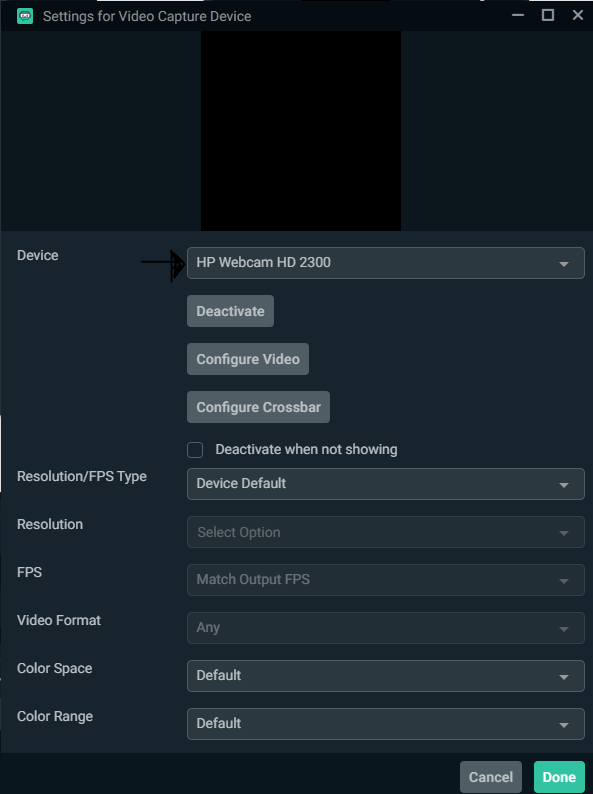
To connect the web cam it is very simple go to the home page and go again to the Source category press the cross + and select on the tab that will open Video capture device you press add source you enter whatever name you want and on the device you select the camera you have Done and you are ready, however then you can put where you want the camera to appear on the screen.

How do I make the game look livestream.
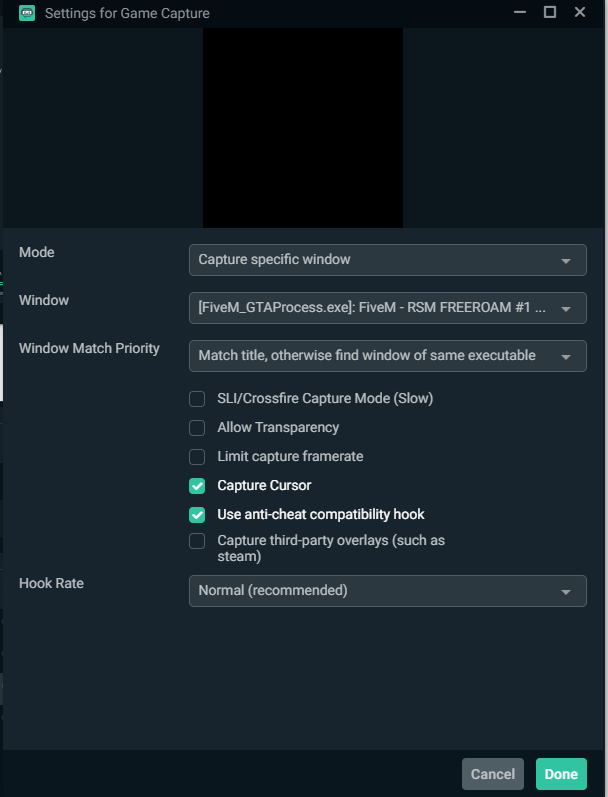
Go to the home page go to sources click on the cross + and as soon as the tab opens you select it Game capture in mode we press to be capture specific window and below that says window select the game you have open and want to do live ..

Finally if you want to have alerts for recordings and donated to the source category to be on top because if it is below the example game you will only hear the sound. And that was you press Go Live and you are ready to do your first live.


If you have any questions write me in the comments below thank you.
See here : GTA V RP | Money from Gaming Online

